Digital
Image Processing
on the Mac
Bill
Majoros
June, 2007
For 99.9% of my photographic work I process the digital image
files
using only the built-in software that shipped with my Apple Macintosh
computer. Similar software is available cheaply or for free for Windows
and Linux systems (I switched from Linux to Mac at about the same time
I took up photography). Although I do have a copy of Adobe's Photoshop,
and have used it a (very) few times to remove vignetting from images
taken through my astronomical telescope,
I've found that tinkering with Photoshop just takes too long. Since I
often take hundreds or even thousands of photos during regular weekend
shoots, I simply don't have time to apply complex processing to all of
my photos.
The Mac program I use is called "Preview", and ships as a standard part
of the OS X operating system. Although this program is generally
only used as a basic utility for viewing image files, it has some very
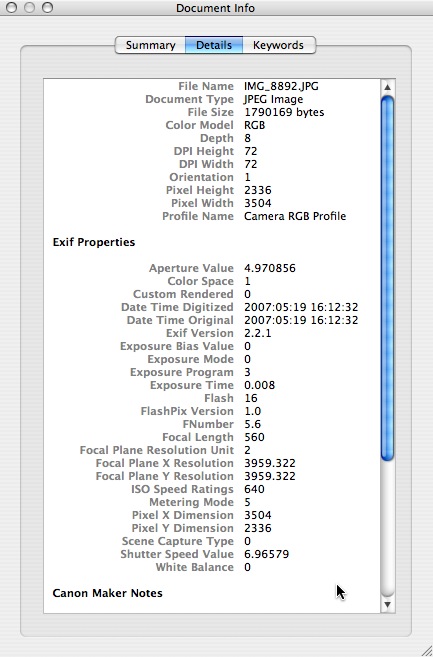
useful functions, such as the "Document Info" window, which reports
various figures extracted from the image's EXIF data:

From this I can deduce the ISO setting (560 in this case),
the exposure time (0.008, or 1/125 sec), the aperture (f/5.6), the
focal length (560mm = 400mm x 1.4, taking into account the
teleconverter I was using), and the exact time that I took the photo
(4:12pm, May 19, 2007).
Since "Preview" is the default image-viewing application in Mac OS X,
all I have to do to launch the program is double-click the image file
in the file browser. Preview starts up in under a second on my
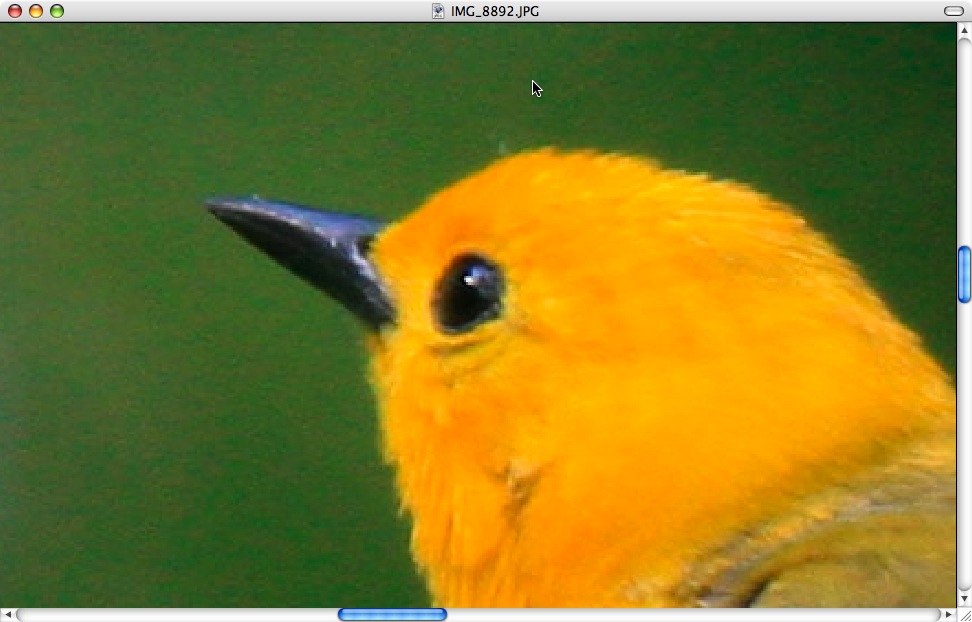
computer. It automatically displays the image in its native pixel
resolution. As you can see from the image below (notice the
scroll bars), at its native resolution the image will not fit on my
screen, so I can look at only a small window of the image at a
time. Here I've centered the window on the head of my subject --
a Prothonotary Warbler:

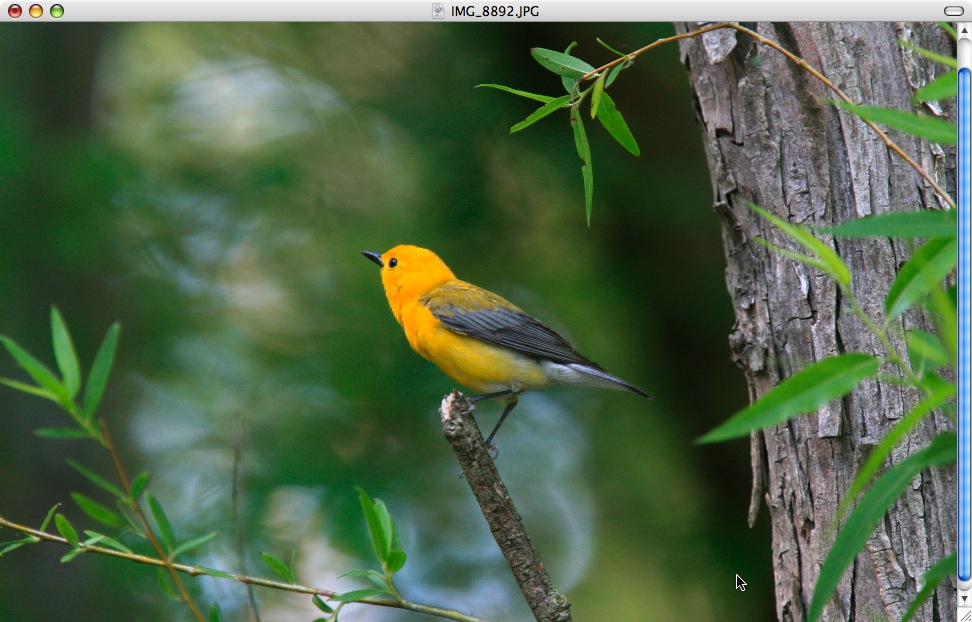
With a simple key combination I can quickly (i.e. in 2
seconds) reduce the image so that the entire bird fits on my screen,
while at the same time also reducing the "pixelation" of the image so
that it appears smoother (though it is, admittedly, rather blurry at
this stage):
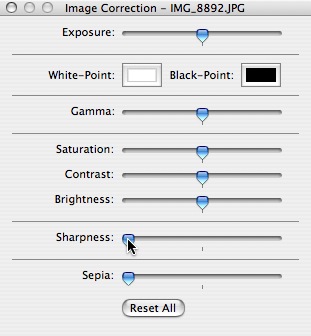
Now I can use the "Image Correction" feature of the program
to very quickly enhance the photo. The Correction tool consists
of 7 sliders, though I only ever use 3 of them:
(1) Sharpness,
(2) Gamma,
(3) Saturation.
The wonderful thing about this tool is that I can immediately slide the
controls back and forth and in a matter of seconds find the ensemble of
image settings which are most aesthetically pleasing to my eye:
In rare cases I've also used the "White-Point" feature to
correct for extreme color aberration, but I almost never need it.
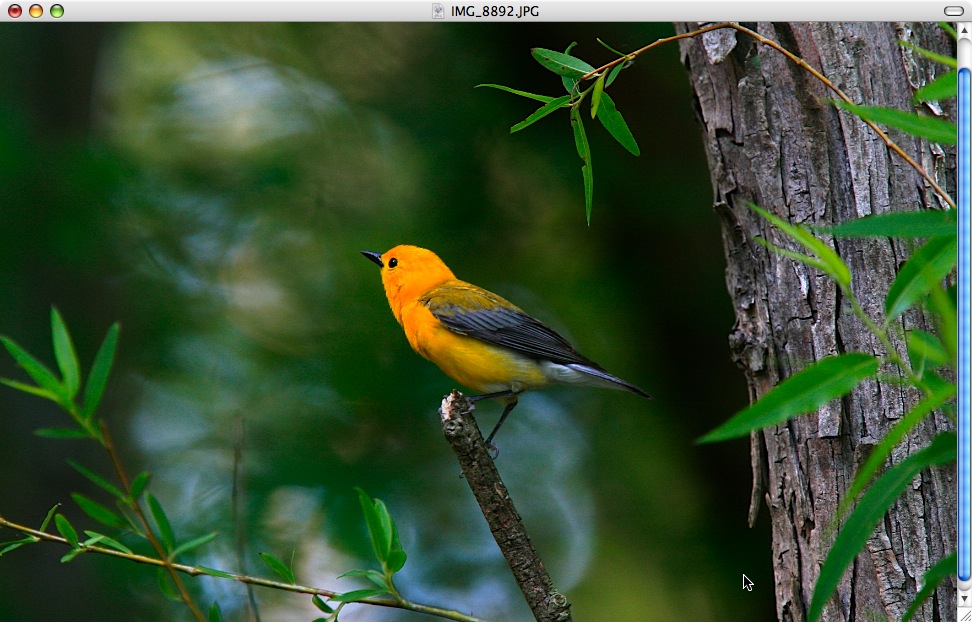
To see the effect of the Sharpness slider, observe what happens when I
slide it about 20% of the way from its default "zero" setting:
If you compare this image to the previous one, you'll see
that there is a very slight difference in sharpness (you may have to
scroll back and forth between the images several times to see the
difference, since it's a bit subtle).
The sharpened image should seem to be slightly more "in focus" than the
preceding image, and indeed, this feature can sometimes correct for
very slight focusing
errors in images, though it cannot magically turn a completely
out-of-focus image into an in-focus one. Overly agressive use of
the "Sharpness" slider results in fairly obvious defects in the
resulting image:

While the above image may at first seem more pleasing in its
greater sharpness than the preceding image, if you look at it long
enough you will see that it is much grainier, and is in some ways
reminiscent of photography published in cheap books from the 1970's and
early 1980's (and in the dirt-cheap editions regularly placed on
clearance at Border's...).
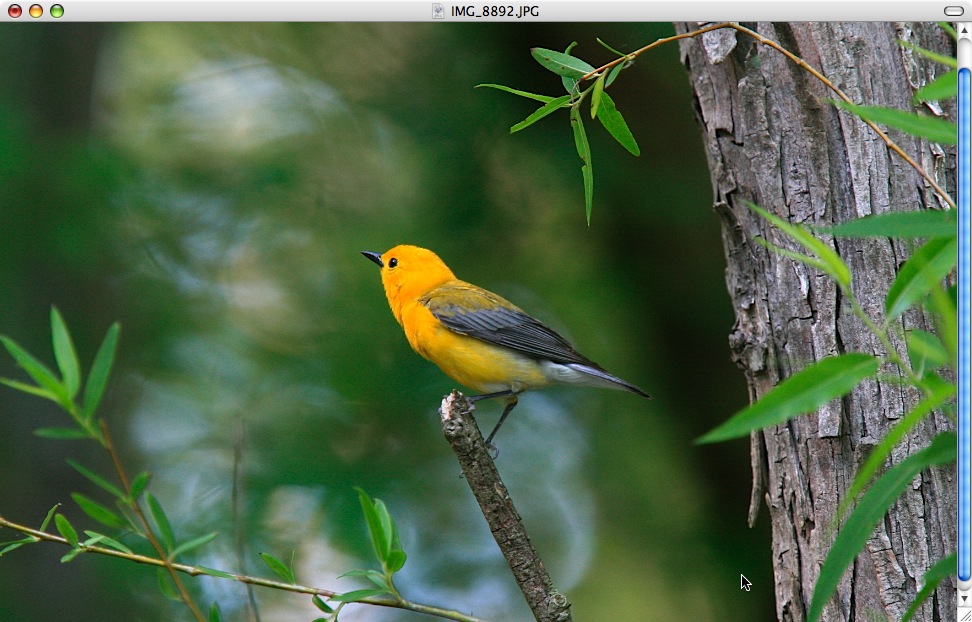
Next, let's see what happens when we twiddle the "Gamma" slider:

Here I've increased the "Gamma" by a modest amount, and you
can see that the image has, overall, become somewhat darker, though the
bird remains bright. The gamma metric incorporates elements of both
brightness and contrast, and also tends to affect saturation
(somewhat). Apart from the Sharpness slider (which I almost
always tweak at least a tiny bit), this is the main slider which I use
in the Preview program. I never, ever, touch the Brightness
slider (never!), very rarely
touch the Contrast slider, and only tweak the Saturation slider when
Gamma leaves me wanting still more color.
Gamma is a truly wonderful thing. Since it automatically controls
for both brightness and contrast, a quick exploration of the slider's
range gives a fairly accurate indication of the image's potential along
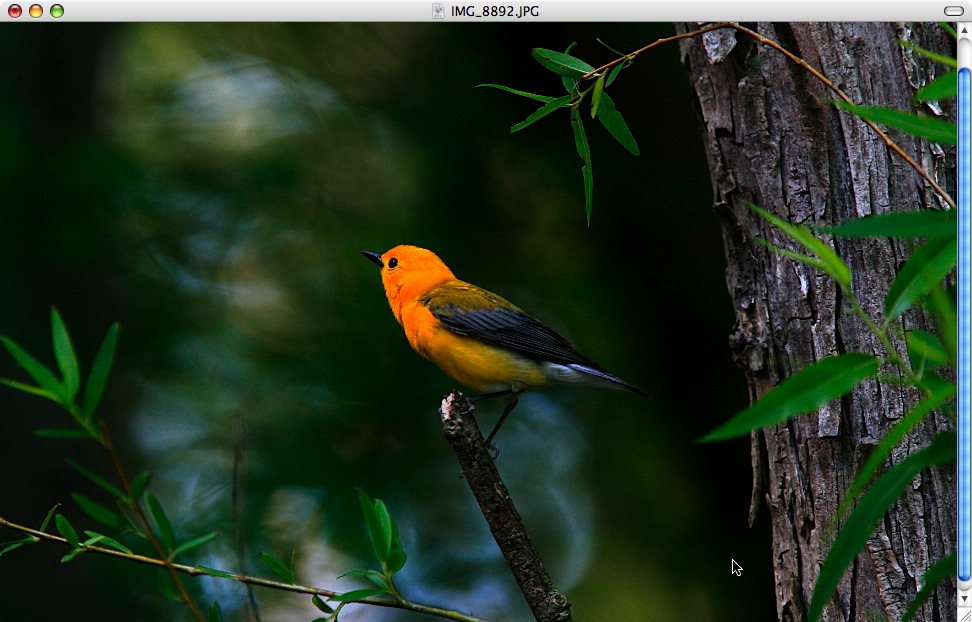
these two parameter axes. The following image was obtained by
pushing the Gamma setting to the extreme:

Keep in mind that all of this twiddling with my mouse cursor
has taken no more than about 15 seconds -- which is literally all I can
afford when processing the thousands of images taken during my most
recent weekend jaunt.
At this juncture I should note that currently I only prepare
my images for web distribution, and only very rarely print them out
onto photo paper. Thus, my methodology is geared entirely toward
optimizing my images for display in the web browser.
To that end, I find it extremely useful to adopt a WYSIWYG approach to
image preparation -- that is, What
You See Is What You Get (=WYSIWYG).
Since I prepare my web pages using my own custom software, I know that
the (manually processed and cropped) images will be served in their
full resolution to web browsers. Thus, I utilize this knowledge by
trying to capture the image in the exact resolution which seems (to my
eye, at least) optimal for viewing on a computer screen.
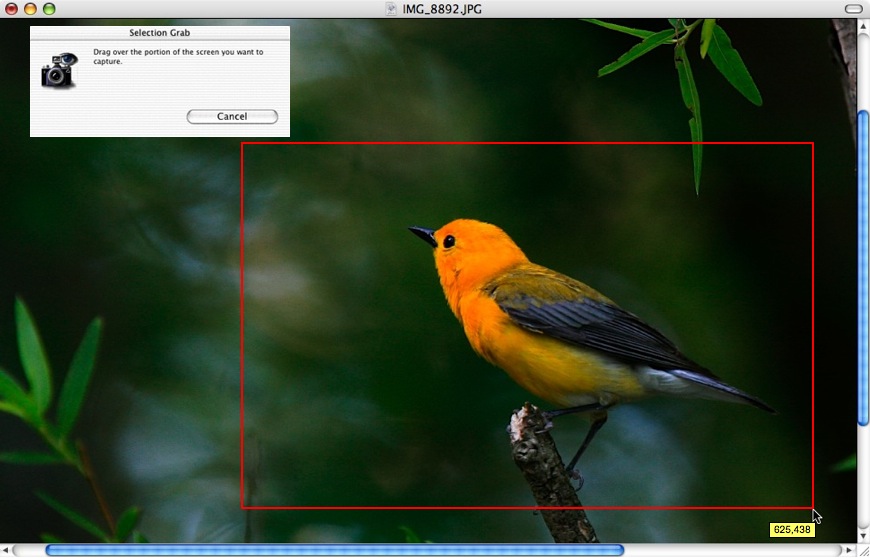
I do this by using another built-in program in Mac OS X -- the "Image
Grab" utility, which is shown in action below. Using this tool I
can choose the cropping which places the subject and its surroundings
in the most aesthetic positioning within the resulting image. The
selection tool creates a new image file containing exactly the image I selected
on-screen, so that at the time I perform the selection I know exactly what the resulting image
will look like when viewed later via the web:

Other operating systems have their equivalent. The important
point is that I optimize the image for viewing on my computer screen,
then capture the image exactly as I see it, and serve that image over
the web at the same resolution, without any image resizing (except
where over-ridden by rogue web browsers...). This is important, because
an image which appears exceptionally sharp on my screen can look quite
blurry when it is resized using a standard image scaling algorithm.
I take this philosophy to the extreme: when preparing my images I never
scale them by any non-integral factor. I only zoom in or out by a
factor of 2. In this way, mathematical rounding errors by the
imaging software when pixels are re-mapped during a scaling operation
are minimized, so that maximal sharpness is retained during scaling.
Since the cropped version of the image that I publish to the web is
stored in a new image file, I leave the original image from the camera
untouched -- that is, I don't save the changes to the original image
file. That way I can always re-process the original image
later -- for example, if I want to print out a full-frame version on
photo paper.
In terms of the actual distribution of images over the internet, there
are a number of web sites which provide different services at different
prices (some free, though generally with limitations). I prefer
to run my own site with my own custom software. This way I can
retain complete control over any transformations which are to take
place before the viewer sees the image on his or her screen.
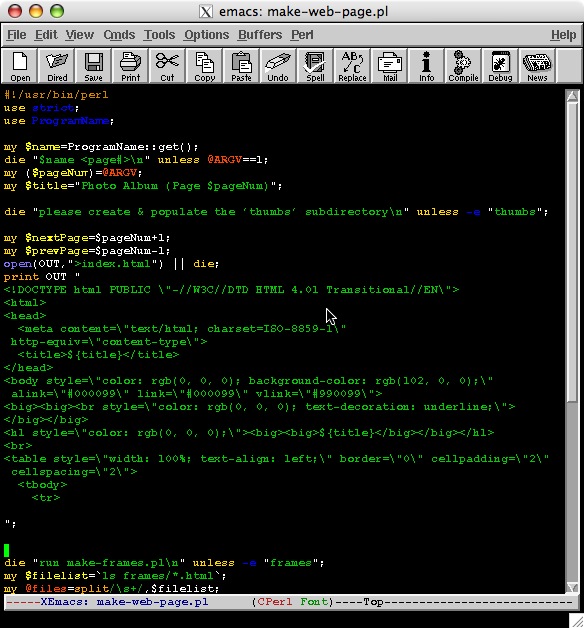
The software I use is very simple, and is written in the
freely-available language Perl.
I edit my software using the free software XEmacs:

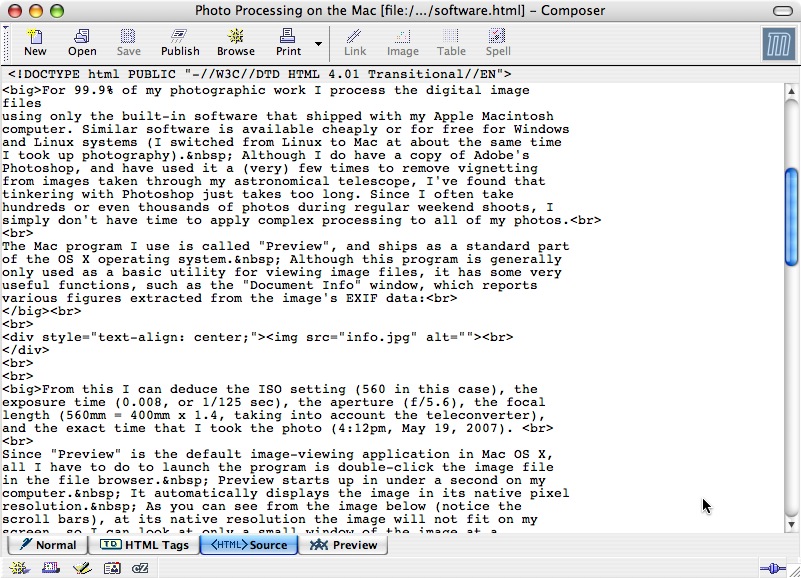
The software I use automatically generates thumbnail images,
slideshow sequences, and the main HTML file for each photo album. To
tweak the appearance of each page (i.e., to customize the colors and
accompanying text for the thumbnail index), I use the free software
suite Mozilla:
Once I have a new photo album looking exactly as I like it on
my own computer, I upload it to my web site using the UNIX "ftp"
program. For serious distribution of photos (i.e., lots and lots
of them), managing your own website can be highly effective, both in
terms of the monetary costs and the flexibility thereby afforded.
My web hosting provider, IPOWERWEB,
provides an obscene amount of storage space (many Gigabytes -- enough
to store many thousands of photos) and full customizability for about
$8 a month.
